
Updated: October 2, 2026
How to connect an AI assistant to P1
This guide connects your AI assistant to the P1 MCP server, so the assistant can read and edit content on your P1 sites.
Before you start, you need:
- a Pantheon account with access to at least one P1 site
- one of the clients below, or any MCP client that supports Streamable HTTP
Server URL: https://mcp.p1.pantheon.io/mcp
Choose how the assistant should sign in:
- As you: the assistant acts with your permissions. Use this for day-to-day work in a chat client. Follow Connect as yourself.
- As an agent: the assistant uses its own key and permissions. Use this for autonomous agents. Follow Connect with an agent key.
Connect as yourself
Claude Desktop
- Open Customize → Connectors.
- Click + Add, then Add custom connector.
- Name it Pantheon P1 and enter https://mcp.p1.pantheon.io/mcp as the URL.
- Under OAuth client, choose Register automatically, then click Add. If you don't see this option, just click Add.
- Click Connect, then sign in with your Pantheon account and approve access.
On Team and Enterprise, only an Owner can add connectors. Ask an Owner to add P1 under Organization settings → Connectors, then find it under Customize → Connectors and click Connect.
Cursor
- Open the Agents Window’s left sidebar and click Customize.
- Navigate to the MCP tab.
- Click New MCP Server, or Add Custom MCP if you have none yet.
- Add this entry to ~/.cursor/mcp.json and save:
{
  "mcpServers": {
    "P1": {
      "url": "https://mcp.p1.pantheon.io/mcp"
    }
  }
}- Open Customize in the sidebar and click MCPs.
- On the P1 row, click Authenticate, then sign in with your Pantheon account and approve access.
Claude Code
- Run:
claude mcp add --transport http p1 https://mcp.p1.pantheon.io/mcp- Start Claude Code and run /mcp.
- Select p1, choose Authenticate, then sign in with your Pantheon account in the browser window that opens.
Connect with an agent key
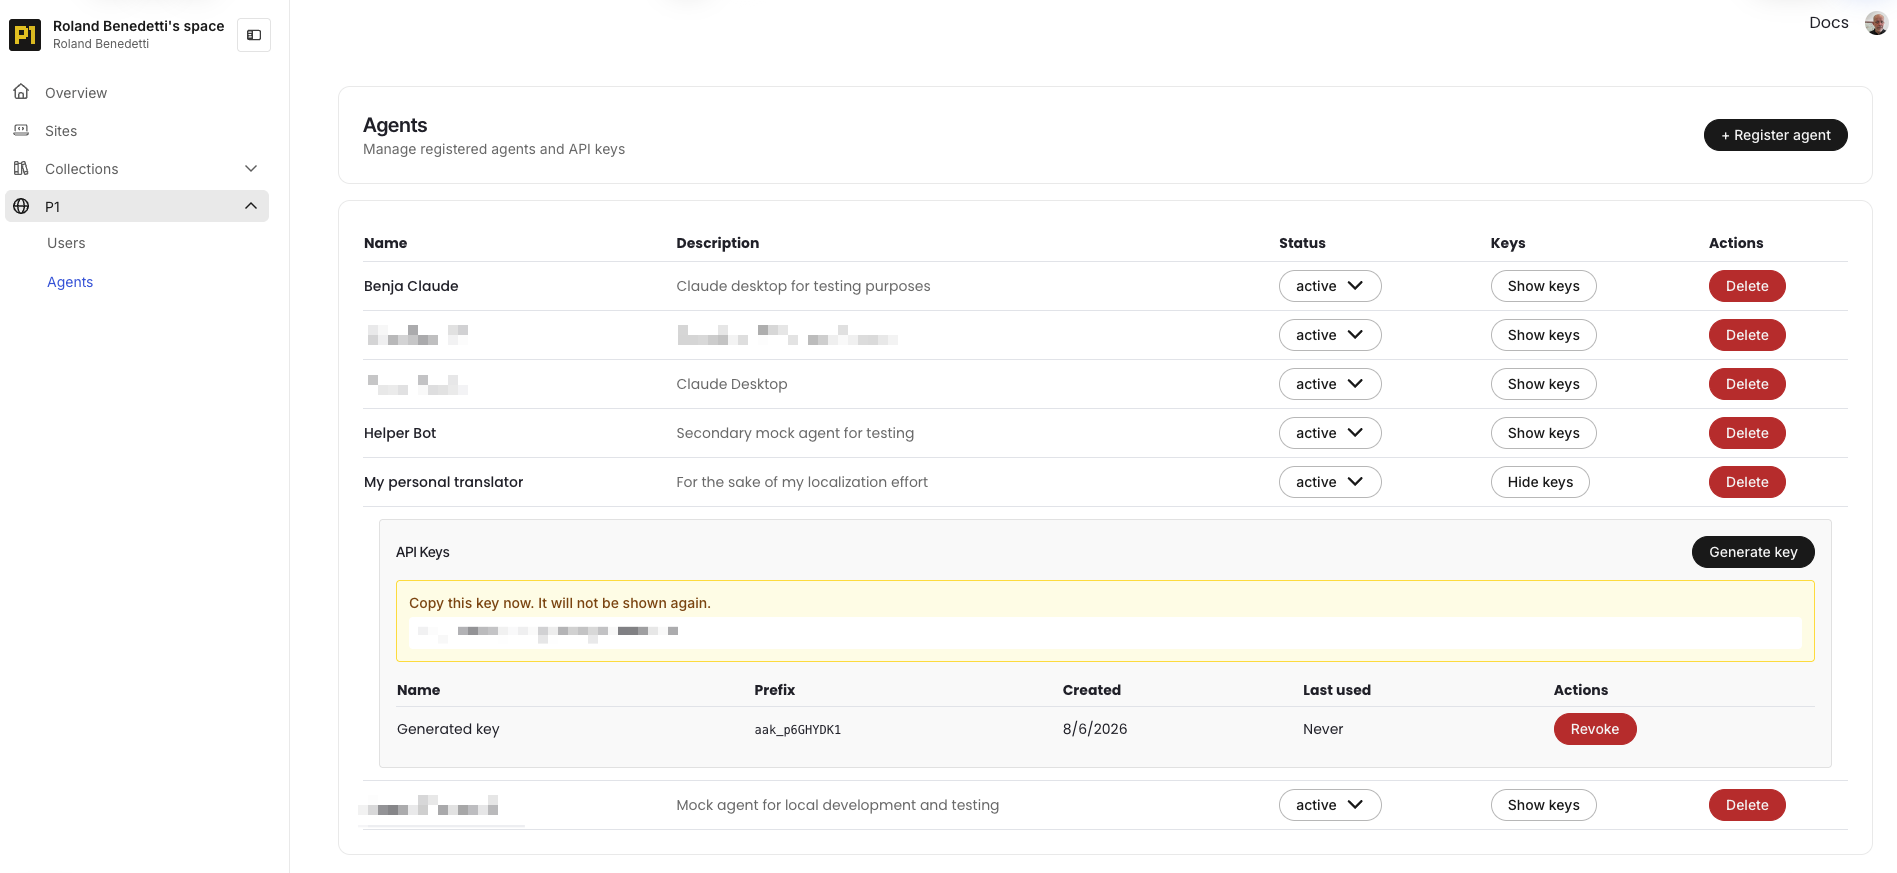
- In the P1 dashboard, go to Agents and click Register agent.
- Give the agent a name and description, then click Register.
- Click Show keys, then Generate key. Copy the key now, because it won't be shown again.
- Ask a site admin to give the agent access to the sites or workstreams it needs.
- Add the server to your client and send the key in an X-API-Key header.
Claude Code
- Run the following command in your terminal:
claude mcp add --transport http p1-agent https://mcp.p1.pantheon.io/mcp \
  --header "X-API-Key: YOUR_AGENT_KEY"
Other clients
- Add this entry to your JSON configuration file and save:
{
  "mcpServers": {
    "p1-agent": {
      "type": "http",
      "url": "https://mcp.p1.pantheon.io/mcp",
      "headers": {
        "X-API-Key": "YOUR_AGENT_KEY"
      }
    }
  }
}
Some clients use a different format (VS Code uses "servers" instead of "mcpServers"). Check your client's docs.
An agent key doesn't need a browser sign-in. It works as soon as the config is saved.